Pages

Showing posts with label kids classes. Show all posts

Saturday, November 16

Collaborations at Fleisher

 These wonderful, goofy kids made this fabulous wheatpasted arrangement of prints on the free wall outside Fleisher Art Memorial today to culminate our semester together.
They started off as 3 inch square zentangle doodles which were scanned into photoshop and repeated to create rotational symmetry. They were printed out as photo positives and exposed onto screens. Most of the ones on the wall are just 1 color prints of their key images. In the studio, though, they printed another set of 2-3 color prints with shapes behind their key image like in the ones that have green triangles. I like to have some reason for the multiplicity of prints we generate in the silkscreen studio, so they often end up as collaborative installations of some sort or another.
This wall was recently tagged up by a local graffiti-ist. It's a "free wall" for our kids classes to experiment with public art, but this is the first time in a long while anyone outside our school has tagged it. The tag was not very aesthetic to say the least, and covered up a previous stencil project I did with my screen-printers. The wall wasn't looking great since a previous wheatpasting by the digital photo class had disintegrated and been tagged. So at least we covered up the eyesore of old wheatpaste with our tile-like prints. The front desk printed out a letter addressing the recent tagger and asked that we wheatpaste that too! It suggested that the tagger come take art classes with us to improve their aesthetics!!

I'm hoping the weather doesn't get too rainy so that our wheatpaste survives for a while. Now for a short hiatus from community art. Registration for Winter session opens on Monday the 18th. In Winter session I'm offering Color theory (free class!) on Tuesdays from 7-9:30, Stitch and surface on Thursdays from 6:30-9:30, Printing on fabric on Saturdays from 9-12, and my teen silkscreen class on Saturday from 1:30-3:30. Bring some life into the winter doldrums with an art class!

Sunday, July 21

Animation and softies roundup!

I said earlier that working felt good. I'm lucky to have a job I love, and no matter what's going on in life or in the world it's hard to stay sad or mad when being creative with kids. I had morning and afternoon workshops at Fleisher summer camp last week, and both classes were TOTALLY full! This is the 3rd or 4th summer I've taught "Critter Softies" but never to such a large group before. Sixteen kids ages 7-10 came out and learned how to sew and construct stuffed toys.
As usual, we started off with a simple 2 sided felt animal so they could learn the basics of sewing. It's important they learn how to thread a needle, start and stop a thread, and do whipstitch, as they need to use the skill for closing up the opening on a machine-sewn softie too. 
 
We did  story and character brainstorm to come up with ideas for a hand-colored softie. I have the kids draw and color with fabric marker on plain muslin, and then do either a colored front and back or a colored front with fabric back. There were lots of Happy Feet penguins, a Totoro, and several  Loraxes. Kids who had time also made a friend for their character so that they could do imaginative play.
 These stuffies are sewn on the machine, but some kids added on handsewn limbs. I love seeing kids 2D drawings turn into 3D stuffies they can play with!
 With the kids ranging in age from 7-10 there's a huge difference in motor skills and craftsmanship. The rabbit sleeping on the moon below was AMAZING! She appliqued the silky white bunny over the muslin moon on both sides, stuffing under the applique before closing it up. I was really careful on the machine for her, and it came out perfectly!
The last project was a build-a monster. We did a roll-the-dice game inspired by the cartooning game "Pick and Draw".  I didn't have a deck, so I drew out 6 options for body, head, arms/legs, and facial features, and gave the kids a dice to roll to select their part. I wanted the kids to get the idea of how the pieces would fit together in sewing as well as get some inspiration. In the past I would have the kids draw their design, and then I would draw out the patterns they needed, or have them draw them. Unfortunately, it's REALLY hard to get them to understand the need for a certain scale when sewing, and they always draw things too small or skinny. So for the first time ever I came up with some simple templates that gave them construction options, and showed them how they could mix and match to make a creature of their own design. It was a good happy medium between my need for scale and consistency, and my desire to let them have choice and creative expression.. For the monsters I let them use any fabrics they want from a big bin- mostly rescued upholstery samples from the design center interior design showroom (I still have 3 huge bins full from when I worked at one 5 years ago!!!) So the creatures have very interesting patterns and textures.
We ended up making over 60 stuffies together over the course of the week. They went home with full arms and happy faces. 
I hope this video uploaded okay. My mornings were spent with fifteen 11-13 year olds for an animation workshop. This was the very first time I've taught the workshop and taught in our digital lab, so I had a bit of a learning curve. We started off with making flipbooks from videos of the kids in the courtyard. We watched a bunch of stop motion animations and learned the history and process of stop motion animation. Then the kids spent an entire morning working in teams to make the animations in the video above. Finally, I met with each team for editing while the kids worked on some photoshop drawing animations:
I was really pleased with how well the students worked together- one thing that helped was a worksheet I had them complete to plan out their storyline, shooting location, and supplies needed. The content was totally up to them. Some groups were very invested in telling a story while others explored movement of figures and materials. On the last day we invited parents for a viewing party, and we had a great turnout.

I'm very thankful I had these creative kids to work with this past week. Art is life-giving.

Monday, July 15

teen screenprint roundup

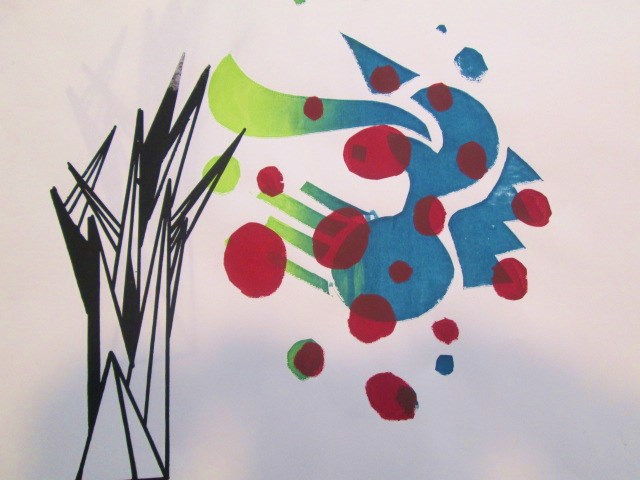
I'm only doing 2 weeks of kids camp this summer. Here's what came out of last week's silkscreen class for 12-18 year olds. We started off with collaborative abstract shape layers topped with an individual line layer. I love the serendipity of what happens in this process of sharing screens and colors. It generated a ton of diverse prints that created a perfect opportunity to talk about what makes a good print or bad print, good composition and bad. etc. These were the best of about 40 prints:
I love how the black line print looks like a shadow of the purple layer.
 This print in 2 transparent color layers showed how colors can mix.
 This very simple line layer makes this print look like an abstract color wheel to me.


 The kids donated a few of their least favorite prints to cut up and turn into an installation in our stairwell. I've always thought we needed more color in there!
 The rest of the week was devoted to screenprints. I actually borrowed the digital lab this time so the kids could develop their own computer imagery- Many brought in internet images they wanted to use. They're always very satisfied to select imagery to print instead of drawing their own. I think it's okay when working in screenprinting and embroidery- like appropriation is part of the medium itself. Additionally- it takes the pressure of adolescents worrying about their artistic skills. You don't necessarily have to be a great artist to be a good printer.

 Not bad for 8 kids who've never printed before.

Saturday, June 1

Mind Map

I'm having a great semester with my 11-13 year old silkscreen class at Fleisher (partly because my daughter is taking it for the first time too!). The group worked so efficiently, that we ended up having time for an extra project. One of the adults who takes an evening silkscreen class had left an awesome sketch behind that reminded me of a system or diagram, but which was very open-ended for interpretation, and it gave me a great idea for a project. I wrote out lots of words on slips of paper and had the kids pass a bowl, take a word, and sketch whatever the word brought to mind. After several rounds, they had lots of disconnected imagery. We played with the copy machine, duplicating, shrinking, and enlarging the images, then headed back to the studio and made a collage that would make the images make more sense. Another copy machine trip turned the collages into a photo positive to burn our screens. They printed, and then added color to one print with colored pencils. They cut it into an organic shape, cut out some construction paper arrows, and then headed to the main stairwell to combine all their prints into one installation that made sense or became a system. My daughter's print is at the very bottom and has a sleeping dreamer. The kids thought their images could be a dream system.... an excellent way to make all of these disparate images come together as a cohesive whole. I love working at a place that lets me work as an artist with kids, and lets kids have authentic artmaking experiences. They work in a real studio with real art materials, and we let the work transform and change depending on what happens there. It's easy when I have 8 kids to work with. I wish I could find a way to work more in this vein in my elementary school. Art teacher and teaching artist seem to be different roles, and a lot of it depends on the institution one works within.

Tuesday, March 5

The 100 print challenge

Look at this:
 This is a vision of a well-oiled machine. My Saturday teen screenprinters at Fleisher are doing an AMAZING job trying to complete a 100 edition 2-page zine. Which means one sheet of paper will get printed on 8 times (4 images per sheet, 2 layers of color per image). Their zine contains images and views in and around the Fleisher campus, and we will distribute them to visitors on the last day of classes.
To print 100 sheets of paper is a true feat, but by the time they complete it they have honed their technique for how to get a clean pull. Sometimes screenprinting with my teens seems a bit pointless- why have multiples of anything? But this works. It has been refreshing to work with this group of teens. Most days I'm with the 5-11 set, and if I hear one more tattle tale I think I'll flip my lid. But this group has worked so well together and so maturely that I don't feel like I'm working. We're just in the studio... making our zine... yeah!

Saturday, September 29

Stencils

 I have a new crop of silkscreen students at Fleisher- this time in the 14-18 age group. With only 8 kids, it's really a pleasure working with a more mature group. We kicked off the semester learning about the roots of silkscreen in paper stenciling.
 Asked to combine a word and image that related to nature, the students designed a freezer paper stencil, being careful to include enough "bridges" between shapes. Then they came up with a second simpler shape and cut it out of contact paper for an adhesive stencil on the screens.
 Last week we printed the large simple background shapes using the adhesive stencils on the screen. This week we stenciled our key image on top with sponges, which allowed for more specific color placement than regular screenprint would have allowed in one layer.


 Once our paper prints were complete we headed out to the "free wall" in the parking lot and stenciled our key images in a random arrangement. The wall has been totally blank for a few months, so it was pretty cool to activate the space with our nature-themed prints.
Having put our art out in the urban environment, next week we'll go looking for image from the urban environment to put back into our art.

Friday, September 7

Teen Lounge, Teen machine

After school today I attended a reception at the Philadelphia Foundation for an exhibition called Teen Machine of artwork created through Fleisher's various programs for teens. It was very exciting to see my Saturday silkscreen students' collaborative piece hanging on the wall right at the entrance greeting everyone:
 Then down the hall were a selection of photographs from the Community Partnership in the Arts mural project I did with Work Ready teens at the Houston Center this summer:
The rest of the show was filled with imagery made by the kids in  Fleisher's drop in Teen Lounge program. It was fun to see the potential of the Teen Lounge because my daughter is finally old enough to join the program, and is looking forward to starting with them this Fall.
Exhibition is an important part of the creative process. It means a lot to me that the kids I've worked with have had a chance to show off their work with a larger community. It's also nice to get this reminder of all the creativity I've facilitated this past year. It's really a privilege to get to work with youth and be a part of shaping their artistic development.
The show will be up in the Philadelphia Foundation's office, 1234 Market St Suite 1800.

Thursday, August 30

My Blue Art Room


This sign is on my door greeting students to the Art room
I've started school this week! Last week I went in and set up my new art room. This week we had 2 days of professional development, then 2 days with students. However, students don't see Specials the first week of half days, so I had some extra time to really make myself at home in my new space.
I've worked at the school before as an intern with the last art teacher and as a substitute teacher, so some of the kids remember me from before. I've had lots of little faces pop by my door with an excited, "Hey! It's Mrs. Elcin!" often with their sign language "L" touching their chin ("make an L, touch your chin, that's how you remember Ms. Elcin). I also found a few pages at the bottom of a drawer, which turned out to be apology drawings and letters for naughty behavior addressed to me from when I subbed!! I feel very much at home already.
I've decided that my new role as a K-5 art teacher deserves its own blogspace. I will continue to post my activities in community arts and the studio here at Colored Thread, but if you wish to read more about K-5 art education, you may want to follow my new blog My Blue Art Room. I've just posted pictures of my classroom layout and environment, so please head over there. It'll take a while to fill out the blog with links and pictures, etc, but it will definitely evolve. Thanks for visiting!

Friday, August 24

The last week of summer


last week's cheesesteak giant greeted visitors to our "gallery"
  NLArts summer camp visual arts week was a lot of fun. We've worked for years to get a good plan of schedule/teachers/lessons, and this year just felt so EASY (to me anyway).One major change was that during visual arts week kids only chose one morning elective- 2D art, 3D art or public art, instead of 2 of them, and we gave them a longer period of time to work in. This allowed us to have much more time for generating ideas, working, and reflecting.

"Problemsolvers" created a geodesic dome
 In the afternoon we gave kids a choice among "ProblemSolvers" (math-based art), "Photoplay" (working with digital images), "Explorers" (short walking field trips around the community), and "Comics" (self-explanatory, right?). Kids chose their first 2 electives to keep all week, but then we gave them a daily choice of afternoon play elective- gym sports, park visit, or indoor board games/play. It's brilliant allowing kids to choose their activities- they're doing things they want, and end up hanging out with kids that share their interests. Gym and Explorers was popular among the more energetic ones. Painting and board games was a common choice for the quieter sorts of kids. I wish real school had this much opportunity for choice. You can still teach all sorts of concepts in these formats, even if at first glance they seem quite different.

3D artists made papier mache masks
On the last day of camp we set up a "Gallery" of kids art and have popsicles for everybody.Parents come and see everybody's work. This year instead of arranging art by project, each child had a spot to show off their collection of artwork.
my daughter created a circular hanging poem about the Frankford neighborhood
 Our junior counselors (middle schoolers) worked in the morning on projects related to various communities around the city, and made collage and digital artwork reflecting what they'd discovered.

cityscape with windmill
  I taught the 2D elective with a great group of 7-11 year olds. We focused on a project to show background/middleground/foreground. First we went to the park and traced the skyline around us with our fingers. In the studio we did a crayon city drawing, and then pulled india ink over it with a popsicle stick to create skyscraper silhouettes. Afterwards we painted the skies in various colors. It was fun to try to arrange them in order from morning to night based on the sky colors when our background step was done. On the next day we made our middlegrounds to start a community garden in our cities. First we did a soft watercolor painting in yellow and blue to make a mottled green wash. Then we made sketchbooks and went on a neighborhood walk to collect leaves and sketch. Finally we printed our leaves over the watercolors. On the third day we cut a curvy line across the leaf prints to make a nice tree line effect, and collaged them onto our city backgrounds. Some students chose to extend their picture longer, and others added layers of greenery in a 3D effect. Then we went on a walk to our local community garden. I pulled out some carpet sit-upons and we stopped to look at a book of Georgia O'Keefe flowers and then spent the morning sketching flowers from the garden.

I love Julia's tilting buildings in contrast with her straight flowers
  On the fourth day we painted our flowers with tempera, and then cut them out to collage into the gardens as foreground. And finally this morning we made "Bug Boxes". We received a fabulous donation of tins and boxes from a bead artist in the community. One of the box types was an aluminum cylinder with a window lid- perfect for a little specimen container. I asked the kids to imagine a bug they might have found in their community garden. We reviewed bug parts (head, thorax, abdomen, antennae, wings, stingers, legs, pincers, etc.) and then they drew, colored, and cut out their creatures. By folding the legs in a step-like manner, they were able to make their bugs pop up and look a little more realistic.

an ant hill started as a circle with a cut center and then overlapped
  Sorry the pictures are so fuzzy- I forgot that distance matters on my flipcam. For our exhibit I asked my kids to write about their pictures and bugs. I told them they could write about their process, a description of the work, or be imaginative. Most of them took the imaginative route! "Librdy lands" above is 2nd grader writing for "Liberty Lands", the park we go to for free play in the afternoons.

Patatoglasses bug had no legs to make it 3D, so we made a paper spring
Our photoplay class teacher came up with this awesome project:
 A silly face photo was printed out, and each kid had 3 color copies to cut and manipulate... collaging them onto a larger piece of colored cardstock gave them a bold and instant frame.
 It was a wonderful week of making art with some of my favorite kids. I love watching them grow. My daughter has been a part of the camp since it first started 6 years ago, and we've made good friends with people in the community by participating. It even led us to selecting Frankford Friends as her middle school, since many of our campers are also students at FFS.

AS one of our Jr Counselors says here- Northern Liberties is a diverse community!
Although it would have been nice to have more time to set up my school classroom this week, or have a bit more relaxing time before school starts, I'm so glad I was able to run this camp this summer. They're continuing with a week of field trips next week, but I'm starting school next week instead!

Sunday, August 19

Performing Arts camp

For the past few summers I've helped run a 3-week camp in Northern Liberties. We fill in that gap between when all the other city camps end and school begins with a week of performing arts, a week of visual arts, and a week of field trips around the city. This past week was for performing arts, so we invited a local musician and a local African Dance teacher to work with the kids in music and dance. I ran an elective in giant puppet-making. The best part is that the 7-11 year olds get to CHOOSE what activity they do, which seriously cuts down on behavior issues since kids are doing what they WANT to do. I love it!

our 5-yearolds in their neighborhood jobs uniforms

knotting fabric strips for a puppet dress

 I worked with 2 groups of kids in the mornings to invent a "Giant of Northern Liberties" inspired by the city giants of Northern France and Belgium. (City giant sculptures on Hotels de Ville in Northern France really impressed me as a 16-year-old exchange student). First the kids brainstormed what characteristics our giant should have, ad they each sketched a giant idea in crayon. Then we collaborated on the design by havig each child offer something from their own sketch that they REALLY thought should be on the giant. From their list of features I sketched out a composite, and asked them which part they wanted to work on together in teams. Of course, everybody wanted to work on their own idea, which totally worked to get all our components made! We made armatures out of cardboard, then papier-mached a layer (only one layer though due to time constraints). Next the components were painted in tempera (which got all crackled?!? drying too fast? Damp papier mache? Really old tempera?). Finally we assembled the components by using zip ties, tape, etc. One giant had an ice cream cone head, rainbow wings, bird feet, and a fringed dress of fabric strips knotted to a ring of cardboard. The other giant had a "cheesesteak" body, liberty bell head (with laser eye and mohawk), lightening bolt legs, a trash arm, and a hammer and scythe. The bird-like one took 3 kids to maneuver whereas the cheesesteak giant required 5 kids! We practiced for a while, then performed by "Stalking the city" and "chasing the villagers" (all the kiddos who weren't involved in giant maneuvering). It's ridiculous how happy it makes me to see these kids marching their giant puppet around- everybody wanted to try it out. I don't know if I could do this with a big classroom of kids in quite the same way, so it's a real pleasure getting to work with just 10 on something like this.
Next week we continue with Visual Arts week, where the kids will choose between painting, sculpture, and public art. I'll only be spending the mornings at camp, though, because next week I have to go to school to SET UP MY ART ROOM!!! I'm so excited, and nervous, but mostly excited. Just one more week to go before I start school.....

Saturday, August 11

In the studios

I started to post something earlier, and Google told me my photo storage was maxed out =(. I've gone through and purged some old photos to free up some space. I also put together a small photo book on Blurb from some of my archives on here.
The past week was very busy as it was my last week of day classes at Fleisher for the summer. Here's a glimpse of some things coming out of the studios:
some gorgeous clamp shibori from my Monday  night shibori class

setacolor sunprints form my week-long summer intensive Stitch and Surface class

Joan's portfolio collage from Wednesday's self portrait class

Mural ribbon-cutting with the teens at Houston Center
I've got one last class for my shibori and self-portrait classes next week, then a little break from Fleisher till mid-September. The next 2 weeks will find me running performing and visual arts camps in Northern Liberties, while simultaneously trying to prep for the beginning of the school year! I can't believe how fast the summer has flown by!

Saturday, July 28

T-shirts!!

 I've had a truly awesome week with a group of young teens at Fleisher for silkscreen summer camp. I showed them a few techniques for getting stencils on the screens and how to print, and they just took the ball and kept running! We provided 2 shirts per kid, but they brought some extras again, and we ended up with 26 or so finished products! It looked like one of those T-shirt boutiques on the boardwalk when we were all done.
 On the second day I brought in dyes, and the teens tie-dyed a bunch of the shirts, which made everything more exciting.
 Although I encouraged the kids to come up with original designs, I also let them bring in whatever images they wanted to print. Some of the pop culturey references seemed kind of retro- Superman, Bob Marley, Frankenstein, Star Wars, etc. Others were a little more recent, like Harry Potter and "How I met your Mother'.

 A few used some symbols that I brought in for inspiration- runes, hieroglyphs, and adinkra symbols.
 My favorite, though, was a simple reproduction of an Alice in  Wonderland illustration which I requested be printed on a T-Shirt for me too. "I'm not a serpent, I'm a little girl!" Sometimes when I'm around little kids I feel I must look like this- so tall compared to them.
This was my last week for Kids summer camp at Fleisher. I've got a little break next week, and then August is going to be a real whirlwind.