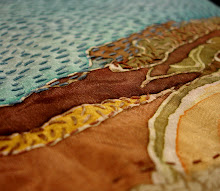
Last week I spent every day from 10-1 at Fleisher teaching the week-long Stitch and Surface intensive to 12 fabulous ladies. For the week I had a theme of photography as inspiration, but it branched out a bit and we squeezed a LOT of stuff into 15 hours of work over 5 days. We made:
- a doodle-inspired sampler to see how drawing marks and stitch marks correlate
- a cyanotype on fabric
- a shibori-dyed piece of fabric
- a handbound book to hold our handouts and sketches
- a final project utilizing our cyanotype fabric or something else
Bonnie had a beautiful photograph to work from of a seascape looking down along a cliff. It felt Irish or Northern Californian. She created a hand-drawn negative on mylar, and added lace at the top for a combination print. Then used a very painterly approach to her stitches for color and texture.
Donnetta had a lovely book of Vermeer paintings and created a hand-drawn negative on mylar for her "Girl with a Pearl Earring". She then took another painterly approach using satin stitches for the planes of the face and head scarf. A lace frame in the cyanotype contact print completes the composition.
Ellen had a book of botanical photographs in black and white. She photocopied a page and cut a paper stencil for her negative. It created a bold silhouette for her cyanotype which she then filled in with satin stitch, fly stitches, and backstitch with an eye for light and shadow in color.
Kathryn had an acetate negative of a forest mountainscape for her cyanotype. She then created a scrapbook-like foreground frame in fabric collage for color, and stitched a trompe l'oeil twig below the photo. She'll add more detail into the cyanotype, but it's a very soft-looking memory image now.
Julie announced at the beginning of class that she didn't like to hand-sew! But she ended up with a lot of embroidery after all. Her inspiration was a magazine fashion photo. She did make a hand-drawn mylar cyanotype print, but ended up scanning the photo and digitally printing it on fabric to add to the fabric collage. She used a lot of fusible web to applique the fabrics, but will add more stitches and embellishments later. I love all the color and pattern in this one, and the experimental way she went about building her image.
Nicole tried out the cyanotype, but for her final project did a straight embroidered image. This abstract-looking composition is actually a reproduction of a microscope view of liver cells. It fits so perfectly inside the hoop, I told her she should use the hoop as a frame like many DIY embroiderers are doing.
This last project was done by Mary Elizabeth Nelson, who teaches the book arts class at Fleisher. She had a real goal to learn as many stitches as possible, and explored each one in a series of sampler composition pages. It took some problem-solving to think about how to do each stitch on paper instead of fabric, since in paper you need to prick your holes prior to stitching, and too many holes can cause perforation and tearing (no satin stitch!). She ended up with 4 complete sampler pages which she bound together with vellum covers and interleaves between the pages.
What a productive week! And what creativity and individuality! I've probably said this lots of times before, but I feel like I've done a good job if everyone's voice shines through the projects, and they don't all look the same. Now I've got to come up with something new and wonderful for the Fall session!!


Beautiful Thanks for posting
ReplyDelete