Last night I completed an embroidery piece that I had to drop off for an exhibition this afternoon. I've always done my own framing, and there are a variety of ways I do it. I thought I'd share one method with you. I went to AC Moore (my local chain of art and craft supply stores) and purchased a plain black 10x10 wood frame for about $15, and came home to frame as fast I could to meet my deadline.
 Supplies: my artwork (wrinkle-free!), a frame with glass removed, a piece of foamcore cut to fit, backing board, quilt batting, needle, and strong thread (I used heavy-duty polyester all-purpose).
First, I cut my batting with one piece slightly smaller than the other and created a sandwich of foamcore, small batting piece, large batting piece.
 Second I flipped the batting/foamcore sandwich over onto the back of my artwork, arranging it to fit within the borders of the image.
 Third I cut a long length of thread, threaded my needle and began lacing two of the edges of my fabric together. I take a small stitch parallel to the edge about 1/2 an inch from the edge. If the stitch is too close to the edge and your fabric is loosely woven, it may pull the warp and weft fibers apart. You need to go far enough into the fabric to have some pull. When I reached the end, I went back and plucked each zigzag stitch tighter, just like lacing a corset. I went back and plucked 4-5 times to ensure even tension before securing the last stitch, and I checked the face of the artwork to make sure there were no off bubbles or distortion.
Fourth I zig-zag laced the other two sides, slightly folding in the corners like giftwrap so they wouldn't hang over the edge. After stitching all the way down the row, I again went back to pluck and tighten each crossover stitch several times to ensure even tension.
 I doublechecked the face of the artwork to see if it was smooth enough before knotting the last stitch. At this point you can slightly adjust the edges of the image to match the edges of the foamcore in case it slipped out of place.
Now the bound artwork/foamcore sandwich can be popped into

your glass-less frame. If you want your work behind glass you should have at the very least a matboard frame to prevent your fabric from touching the glass, as moisture can build up behind the glass and ruin your artwork. I wanted my fabric exposed and without glass this time (oh it's a huge debate and so hard to decide how to frame a textile. For you purists, I know this is not the absolutely ideal way to do it, but I have a lifespan and so will my art.).
Next the card backing that came with the frame gets inserted into the

back and the metal tabs are folded back down to keep everything together.
Next get a package of wire & eyescrews to wire your picture. I bought this little package from the supermarket for less than $2. The frame came with a sawtooth hanger and little nails, but most galleries won't accept artwork with sawtooth hangers. The eyescrews are a bit tricky to maneuver, and it helps to get the hole started by tapping the screw with a hammer. You want your wire to be at about 1/4 to 1/3 of the distance from the top. If it's too far down, the piece will hang forward from the wall. Also keep the wire pretty tight, not too much slack, also

to prevent forward tilt when hung.
The last step is to sign, title, and date the work on the back. I also like to include a medium description. Sometimes I tape a business card on the back (but I'm out of those!). I like this style of framing because the batting causes the image to puff up slightly from the frame. Part of me feels like textiles should be presented to allow people to appreciate their tactile nature and for the light to interact with the surface. Although having a piece behind glass helps protect it from air and dust, it also removes the piece from the viewer a bit. I will always be torn.
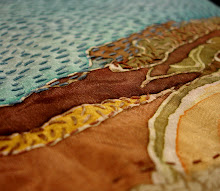
This image is a digital print on cotton of a

scanned watercolor self-portrait appliqued to linen with additional applique of a crocheted doily. The text and details in the hair and scarf are embroidered in whipped chain, chain, backstitch, and running stitch.
The text is taken from Psalm 139, my very favorite psalm, which matches the contemplative look of the portrait. There's some subtext too- the crocheted doily comes from my inlaws and the contrast of the doily and the text represents the conflict of being in an interfaith marriage.

This piece will be on display at International House, 3701 Chestnut street opening March 8th, 7pm.
Here are the details:
Philadelphia Women's Caucus for Art Chapter exhibition sponsored by International House Philadelphia, CARE USA, Women’s Campaign International, United Nations Association of Greater Philadelphia, University of Pennsylvania’s African Studies Center, Center for East Asia Studies, South Asia Center, Middle East Center, Penn Women’s Center. Event is part of One Book, One Philadelphia (Persepolis).


 your glass-less frame. If you want your work behind glass you should have at the very least a matboard frame to prevent your fabric from touching the glass, as moisture can build up behind the glass and ruin your artwork. I wanted my fabric exposed and without glass this time (oh it's a huge debate and so hard to decide how to frame a textile. For you purists, I know this is not the absolutely ideal way to do it, but I have a lifespan and so will my art.).
 back and the metal tabs are folded back down to keep everything together.
  to prevent forward tilt when hung.
 scanned watercolor self-portrait appliqued to linen with additional applique of a crocheted doily. The text and details in the hair and scarf are embroidered in whipped chain, chain, backstitch, and running stitch.


thanks for sharing... good to see you last night
ReplyDeleteI don't subscribe to the RULES either. I have been mounting my embroidery like I do my canvas work, I stretch and staple. I cut mdf board, cover with felt and then stretch my embroidery over it and staple at the back.
ReplyDeleteMaybe its a debate for some, but not for me. I have seen too many good embroidery pieces destroyed with years of dust collecting on it. In my upcoming show the gallery is having my embroidery under glass, bit like the way museums do it ( like a shadow box and using uv museum glass).
Enjoyed visiting your blog :) and your explanation how you framed your work. All the best with the exhibit.