My Stitch and Surface class tried out bleach gel pens for their surface design technique this semester. First we dyed fabrics black and navy. Then this week we all brought clorox gel pens to experiment with bleaching.
We opened up the windows and I set up a fan to ventilate, but it was a cold night for that!! Some people drew directly with the pen-tip built into the bottle design. Other brought along sponge and rubber stamps to try printing with the bleach gel.
The variety of colors and marks were interesting. One has to work a bit fast with bleach gel, because it should be neutralized shortly after the color begins to change.
I wonder what these marks and fabrics will lead to over the rest of the semester!
Showing posts with label dyeing. Show all posts
Saturday, February 1
Tuesday, July 9
Sunday studio glimpses
3 hours.
Finished printing my reduction relief print experiment using a Softcut block. I like that it's easy to carve, but I kind of wish it were firmer to print against.
Stitched down that blue doorway.
Did some shibori over some dye monoprint experiments to layer some pattern. I did a polewrap over the orange just by twisting and spiraling the fabric instead of binding it like traditional arashi. The turquoise has two layers of pleating and clamping. Unfortunately, I think I'm binding too tightly, or folding too much- I'm resisting more fabric than I want to resist. Either that or the fabric is getting exhausted and just isn't taking the dye.I'm back in the classroom this week for teen screenprinting at Fleisher. Next week brings animation and soft sculpture. After that I'm off to an artist residency!!!
Saturday, January 26
Dye monoprinting day!
I have some very proud printers this morning in my Saturday Silkscreen on Fabric class at Fleisher. We started the semester off by preparing our screens for monoprinting by painting sodium alginate and dye print paste directly on the screen. When the alginate dries it creates a resist stencil, but as it is printed it starts breaking down, changing the print as it goes. Since each print is slightly different it's considered monoprinting.
This is the most ambitious group of silkscreeners I've had yet. They played with mixing dye colors and managed to print a basic repeat. This experiment will help them later on do a proper repeat.
Wednesday, January 16
In progress
Just a little peek at my corkboard in the studio. The shibori landscape has been basted to a background cloth and I started stitching some concentric ovals in the icy water section. The patchwork window is almost done: There's just a little more stitching in the figure left. I might leave it hanging for a while longer- I don't really know if it wants more or not. I started a little grey, white, and green study for a potential new "wall" piece. I really loved the large brick wall in red, cream, and blue I made during grad school, and I want to continue doing some larger pieces. New to my repertoire is working with sodium alginate dye paste. So I did a small winter tree test piece to see how viscous the dye needed to be to paint with. I was surprised how crisp the results were- just a little bleeding on some of the edges. I used up the extra dye paste to do a dye monoprint with silkscreen. I can't wait to get back and rinse out the print repetition I did on Monday.
I'm trying to do some stitching, some surface design every time I'm there. Eventually I want to chuck out all the old interior design samples I've hoarded for the last 7 years, since I really haven' used any commercial fabrics in my work for a very long time. I just want my own materials.
Monday, January 7
working
It's so different, going to a studio to make art versus making art at home. I go and the time is so much more focused and productive. There are no distractions. Everything is in one place, not spread throughout the whole house. I know I have to use my time wisely, so I don't dilly-dally. I've been bringing things over bit by bit, and now there's enough supplies to actually get things going.
I've started a shibori piece inspired by the panorama I took at John Heinz refuge with the trees reflected in the ice. My goal is to do a lot more surface design-based projects. I also started a small applique study for a larger wall piece I'd like to do. And I've finally got back to work on the piece I was working on over the summer. It began as a window, and I debated a long time about putting in a shadow figure. A little organza overlay added a narrative element. I can't really believe how long this one has been in process since I first pieced and dyed it.
Being in the studio is making things happen. I hope this creative energy keeps flowing, because my biggest fear in becoming an art teacher in a school was the fear of letting go of my artist identity. I want balance between both. This feels so right.....
Thursday, August 16
Gorgeous
Summer is slipping away. My Fleisher classes are over until September. Here are 2 more pieces that came out of my shibori class:
This red one was pleated, stitched, and bound. The blue mandala-like one was stitched and clamped. I think it looks like a rose window. I wish we could just keep going, making tons of beautiful fabrics. I asked everyone to bring back all their work for the last class, and it was just a sumptuous feast of color and pattern!My brush with google and picasa storage limits drove me to make a blurb book culled from images and blogposts. My little 7x7 softbound 20 pager arrived in the mail today! It looks great! It was really fun to play with page layouts, and think about my work and blog-writing sequentially. There's way more pictures than text, and it has a combination of artwork and inspiration.
If you'd like a copy you can buy it here.
Saturday, August 11
In the studios
I started to post something earlier, and Google told me my photo storage was maxed out =(. I've gone through and purged some old photos to free up some space. I also put together a small photo book on Blurb from some of my archives on here.
The past week was very busy as it was my last week of day classes at Fleisher for the summer. Here's a glimpse of some things coming out of the studios:
I've got one last class for my shibori and self-portrait classes next week, then a little break from Fleisher till mid-September. The next 2 weeks will find me running performing and visual arts camps in Northern Liberties, while simultaneously trying to prep for the beginning of the school year! I can't believe how fast the summer has flown by!
The past week was very busy as it was my last week of day classes at Fleisher for the summer. Here's a glimpse of some things coming out of the studios:
| some gorgeous clamp shibori from my Monday night shibori class |
| setacolor sunprints form my week-long summer intensive Stitch and Surface class |
| Joan's portfolio collage from Wednesday's self portrait class |
| Mural ribbon-cutting with the teens at Houston Center |
Labels:
dyeing,
kids classes,
painting,
stitch and surface
Thursday, July 26
Eye Candy
It's amazing how much creativity is spilling out of Fleisher's studios this week- It feels like a current of electricity or synchronicity or serendipity.
Here's a few luscious pictures from my Monday night Shibori class. We washed out and revealed the kanoko and arashi shibori samples that were tied and dyed the previous week.
I LOOOOOOOOOOOOOVE arashi, which is also known as pole-wrapping. It makes a lovely wavy pattern over the fabric.
Here's my little sample:
I can't wait till next Monday when we wash out our clamp-dyed pieces!
Stay tuned for more student work- I've got a bumper crop of T-shirt screenprints that my amazing young teens have been cranking out this week. I've never had such a prolific group of screenprinters! Tomorrow is our last day of art camp, so I'll have more pictures to share soon.
Thursday, May 31
Get your creativity on! Summer classes available!
Summer is an excellent time to give yourself a creative vacation! Summer classes for adults at Fleisher include 6-week classes that meet once a week and one-week long intensives that meet 5 days in a row.
I'm offering both options this summer and the best thing is classes are truly affordable! Here's a sneak peak at some things you can learn with me:
SHIBORI DYEING: this 6-week long class will cover several techniques for resist-dyeing cloth inspired by Japanese traditions. Techniques will include binding, stitching, clamping, and pole-wrapping to get various marks on fabric.You can dye yardage, make motif fabric panels, or dye your own clothing such as scarves and shirts. If time allows we will also learn a few sashiko quilting patterns to combine our shibori-dyed fabrics into a functional or artistic quilt! This class meets Mondays from 6:30-9:30 pm. July 9th-Aug 13.
EXPERIMENTS WITH SELF-PORTRAITURE: this 6-week long class meets Wednesdays from 6:30-9:30 July 11-Aug 15. This mixed media class will explore many forms of self-portraiture, from traditional compositions to symbolic representations to help creative individuals learn more about themselves through art-making. We will look through the lenses of family, history, emotion, and daily experience to express our perceptions of the self. Media may include drawing, painting (water-based media), and collage depending on your personal preferences.
STITCH AND SURFACE: this one week intensive meets Monday-Friday 10 am to 1 pm August 6th-10th. We will expand our stitch vocabulary with a doodle sampler, experiment with frottage for getting color/texture on fabric, and create an embroidered image with the theme of Memory/Memorial.
Registration is open online at http://www.fleisher.org/workshops/adults.php Sign up soon to ensure that classes will run! Invite a friend or relative to take a class with you!
Labels:
drawing,
dyeing,
news and notes,
painting,
stitch and surface
Tuesday, May 15
Thick like Honey
In my Saturday Silkscreen on Fabric class we're in the middle of my favorite process- printing monoprints with thickened dye (otherwise known as "deconstructed dye prints"). For my demo I found a piece of hexagonal tilework to coat with Havana Brown and pressed it into my clean screen, repeating until the pattern completely filled the screen. The brown dye was left to dry and harden in the mesh, creating a stencil.
Once dry, I printed yellow thickened dye through the screen onto pre-soda-soaked cotton. Each of the 5 prints is different as the brown dye stencil slowly reactivates and breaks down the stencil. I like printing with just 2 colors (one for the stencil and one for printing), but more could be used. I love not having to worry about the dye drying out and blocking the screen, and cleanup is so easy!
It was so fun to have this honey-comb-like print and coloring in the demo, as the print paste is often compared to the consistency of honey. Last semester I mixed it too thin, but I've got it right now!
This fabric is destined for a piece I plan on making for the B Square gallery "Insect Invitational" in the Fall. Just looking at it makes my fingers itchy for a needle and thread!
It was so fun to have this honey-comb-like print and coloring in the demo, as the print paste is often compared to the consistency of honey. Last semester I mixed it too thin, but I've got it right now!
This fabric is destined for a piece I plan on making for the B Square gallery "Insect Invitational" in the Fall. Just looking at it makes my fingers itchy for a needle and thread!
Sunday, February 19
Super week of printmaking on fabric!
Both my Stitch and Surface class and Silkscreen on Fabric class at Fleisher produced a huge quantity of printed fabrics this week.
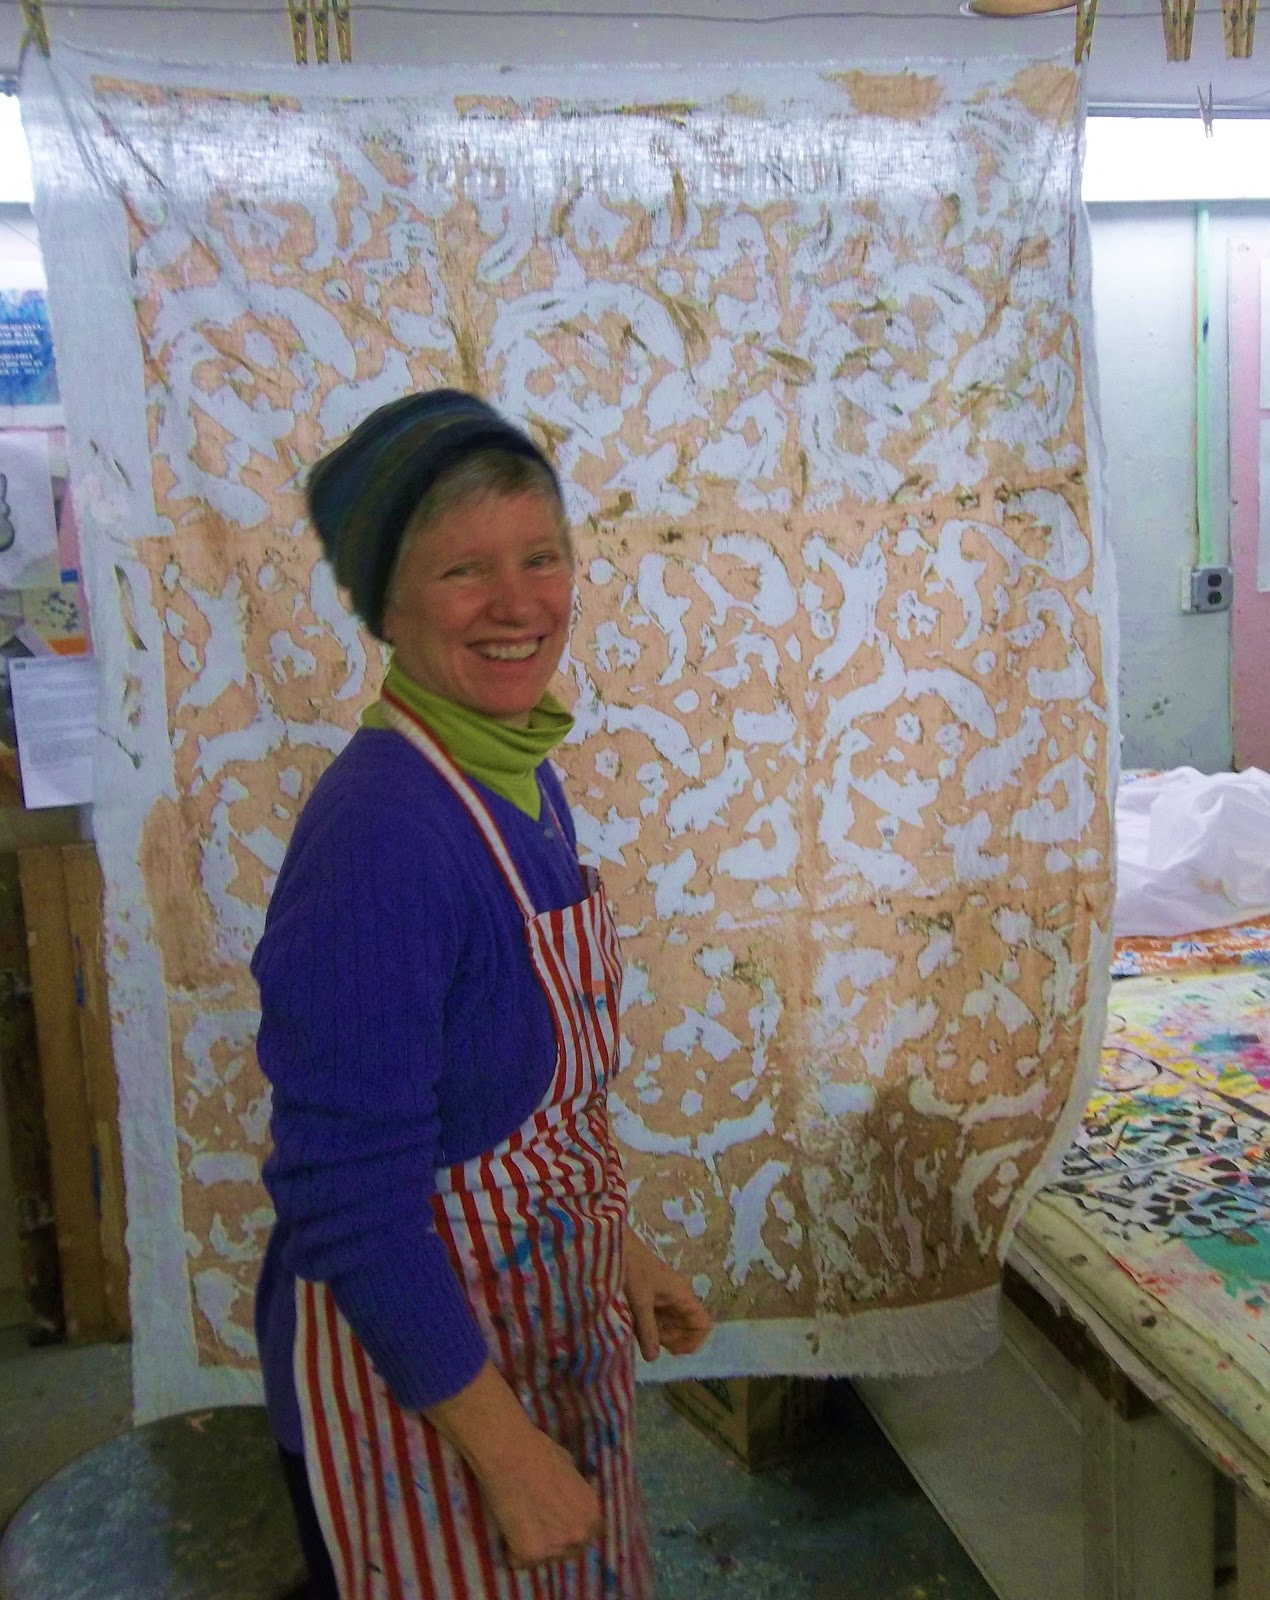
My Silkscreeners got to be guinea pigs as I attempted to teach deconstructed dye printing. I was inspired by artist Dianne Koppisch Hricko to try this out. Last week I mixed up some sodium alginate, we added dye, and then painted or texturized the screens with dye paste. My crew really like image more than pattern, so they were more like monoprints, but one person attempted a repeat (above), while others just printed their images twice.
In the boat print above the left image was printed first and the right image was printed second after doing a flood stroke and letting the brown dye moisten a bit. In the tree image below, the right side was printed first, then the left. The beauty of deconstructed dye print is that the dye applied to the screen first and left to dry acts as a resist at first, but then as the dye moistens it breaks down and becomes printed as well. Some people went back in with some color to connect a repeat or unify an image.
Below is the screen after it was printed, showing only remnants of the "tree" painting that was on it at first. Another thing I LOVE about dye printing like this is that you can leave the dye in the screen to dry and still be able to wash it out- can't do that with pigment ink without ruining your screens!!! The only thing I'm concerned about is that my sodium alginate print paste mixture might be too thin, and our soda soaked fabric might not take the dye as well as I hope. We don't have a steamer, so we're batching the dye.
My stitch and surface class got to do their "surface design" technique this week. I brought in some weatherstripping adhesive foam and we created our own stamps with it.
Some people used wood blocks, others balsa wood rectangles, and others cardboard squares. Some people brought in adhesive backed craft foam to use as well, which allowed them to cut out motifs instead of just using the rectilinear weatherstripping.
We rolled fabric paint out onto plexiglass plates, then used the brayer to apply paint on the block. I hauled our fabric printing boards up from the silkscreen studio so we would have a soft surface to press into.
There was great experimentation with repeating and overlapping:
Some people explored color shifts and printing over pre-existing patterns:
The metallic fabric paints look fabulous:
Once block-printing was finished, a few students even tried out monoprinting by placing strings over the rolled out inks on the plexi plates:
I loved introducing my students to all these easy printmaking techniques. You can do so much with very little equipment or supplies. As I have some teachers in the group, I hope they'll be inspired to try these out with kids as well. (Well, maybe not the dye stuff, but definitely the block printing!!)
PS: my birthday was this week, and to have this much fabulousness going on in my classrooms was a great present!
My Silkscreeners got to be guinea pigs as I attempted to teach deconstructed dye printing. I was inspired by artist Dianne Koppisch Hricko to try this out. Last week I mixed up some sodium alginate, we added dye, and then painted or texturized the screens with dye paste. My crew really like image more than pattern, so they were more like monoprints, but one person attempted a repeat (above), while others just printed their images twice.
In the boat print above the left image was printed first and the right image was printed second after doing a flood stroke and letting the brown dye moisten a bit. In the tree image below, the right side was printed first, then the left. The beauty of deconstructed dye print is that the dye applied to the screen first and left to dry acts as a resist at first, but then as the dye moistens it breaks down and becomes printed as well. Some people went back in with some color to connect a repeat or unify an image.
Below is the screen after it was printed, showing only remnants of the "tree" painting that was on it at first. Another thing I LOVE about dye printing like this is that you can leave the dye in the screen to dry and still be able to wash it out- can't do that with pigment ink without ruining your screens!!! The only thing I'm concerned about is that my sodium alginate print paste mixture might be too thin, and our soda soaked fabric might not take the dye as well as I hope. We don't have a steamer, so we're batching the dye.
My stitch and surface class got to do their "surface design" technique this week. I brought in some weatherstripping adhesive foam and we created our own stamps with it.
Some people used wood blocks, others balsa wood rectangles, and others cardboard squares. Some people brought in adhesive backed craft foam to use as well, which allowed them to cut out motifs instead of just using the rectilinear weatherstripping.
We rolled fabric paint out onto plexiglass plates, then used the brayer to apply paint on the block. I hauled our fabric printing boards up from the silkscreen studio so we would have a soft surface to press into.
There was great experimentation with repeating and overlapping:
Some people explored color shifts and printing over pre-existing patterns:
The metallic fabric paints look fabulous:
Once block-printing was finished, a few students even tried out monoprinting by placing strings over the rolled out inks on the plexi plates:
I loved introducing my students to all these easy printmaking techniques. You can do so much with very little equipment or supplies. As I have some teachers in the group, I hope they'll be inspired to try these out with kids as well. (Well, maybe not the dye stuff, but definitely the block printing!!)
PS: my birthday was this week, and to have this much fabulousness going on in my classrooms was a great present!
Labels:
dyeing,
printmaking,
silkscreen,
stitch and surface
Thursday, October 6
Fading color
| my sample strip with dots and stripes. I didn't leave the bleach gel on too long, and I've got subtle pink left behind |
| I really like Shelby's experiment with a variety of morphing patterns |
| There's a diiferent effect when you drizzle vs. scrape the gel on. These were left longer and there's yellowish color left behind |
| Oh that Havana Brown dye!!!! Bleached to a greenish yellow. |
Unfortunately it's kind of an expensive process- the bleach gel pen cost me $2.99 and only covered about a yard of fabric before being used up. However, the instant drawing tool aspect of it being a PEN with dual size tips, made it very interesting to work with. And the fact that it was in gel form, not liquid made the results have more definitive edges.
Thursday, August 4
Itajime results
My shibori students at Fleisher were wowed by the results of their itajime/clamp resist shibori dye experiments. Clamp dyeing definitely gives dramatic and graphic results compared to the more organic tie dyeing and pole wrapping we've done so far. We also added in the fun of overdyeing some commercially printed fabrics from the scrap pile.
The center one above reminded us of skyscraper windows at night- it had been extensively pleated and clamped with binder clips.
The long piece at right above was clamped with wooden blocks, one of the largest shape sets we had, and gave a very bold butterfly effect
I really loved the snowflake results above left- showing that the wood cutout aisle at AC Moore can yield some interesting resists.
The red and blue pieces above both used a variety of plexiglass shapes and interesting folds for great variety and repetition.
This blue piece was really the most incredible! I'm wondering if anyone can guess what was used as a resist....
On Monday night we also revealed our sun-fade shibori. On the second night we had taken pieces of very dark solid-dyed fabric pieces out to the parking lot and bound them with tape resists, cardboard shape resist, and thread to various poles in very sunny spots. The hope was that if we left them long enough, the sun would fade the exposed areas. We probably should have left them one more week, but there was still some subtle fading occurring on the pieces. Enough to prove the experiment worked!
There's only 2 more weeks left. I'm hoping my students will put together some interesting final projects with the fabrics they've created. I really love dyeing fabric. It's an indulgence to get to teach this class and do some more myself.
The center one above reminded us of skyscraper windows at night- it had been extensively pleated and clamped with binder clips.
The long piece at right above was clamped with wooden blocks, one of the largest shape sets we had, and gave a very bold butterfly effect
I really loved the snowflake results above left- showing that the wood cutout aisle at AC Moore can yield some interesting resists.
The red and blue pieces above both used a variety of plexiglass shapes and interesting folds for great variety and repetition.
This blue piece was really the most incredible! I'm wondering if anyone can guess what was used as a resist....
On Monday night we also revealed our sun-fade shibori. On the second night we had taken pieces of very dark solid-dyed fabric pieces out to the parking lot and bound them with tape resists, cardboard shape resist, and thread to various poles in very sunny spots. The hope was that if we left them long enough, the sun would fade the exposed areas. We probably should have left them one more week, but there was still some subtle fading occurring on the pieces. Enough to prove the experiment worked!
There's only 2 more weeks left. I'm hoping my students will put together some interesting final projects with the fabrics they've created. I really love dyeing fabric. It's an indulgence to get to teach this class and do some more myself.
Subscribe to:
Posts (Atom)